Flask - Part 8
28 Sep 2018 · 5 min read
Introduction
This version_8 will show you how to implement whitelisting.
Whitelisting is defining what is allowed, and rejecting everything else. In our case, we will store the user’s tokens in DB so the user can manage them (that’s how facebook does it, with one token per device lol).
Setting up
To begin we will start from our previous version_7 app. If you don’t have it anymore, no worries, simply copy the reference code.
# assuming you're in flask_learning
cp -R flask_cybermooc/version_7 my_app_v8
cd my_app_v8
and we create our venv.
# assuming you're in flask_learning/my_app_v8
virtualenv venv -p python3
source venv/bin/activate
# (venv)
pip install -r requirements.txt
All set up ? let’s begin.
1 - Declaring the Token
We will create a basic Token model, but you can update it with more fields in your next project.
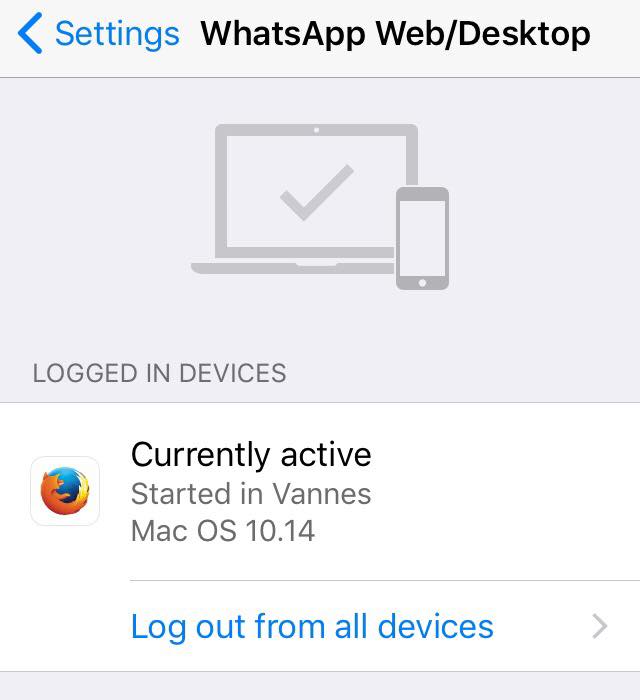
Here’s an example by whatsapp where they store if the token is active, the OS, location etc… And that’s why whitelisting is useful, because you can log out from every device.

1.1 - Creating the token model
So let’s create our model in app/models/token.py.
# app/models/token.py

from .base import Base
from ..database import db

class Token(Base):

    __tablename__ = 'tokens'

    hash = db.Column(db.String, nullable=False, unique=True)
    description = db.Column(db.String)
    user_id = db.Column(db.Integer,
                        db.ForeignKey('users.id'),
                        nullable=False)
Pretty straight forward, inheriting from Base, + more fields like the hash of the token, an optional description and the user’s id.
Let’s import this model in the cli :
# app/cli.py

import click
from flask.cli import with_appcontext
from .database import db
from .models.association import user_roles
from .models.user import User
from .models.role import Role
from .models.token import Token

[...]
Now let’s update our User model.
# app/models/user.py
# http://docs.sqlalchemy.org/en/latest/orm/extensions/declarative/basic_use.html

from .association import user_roles
from .base import Base
from .role import Role
from .token import Token
from ..bcrypt import bc
from ..database import db


class User(Base):

    __tablename__ = 'users'

    username = db.Column(db.String, nullable=False, unique=True)
    email = db.Column(db.String, nullable=False, unique=True)
    encrypted_password = db.Column(db.String, nullable=False)

    roles = db.relationship(Role, secondary=user_roles,
                            backref=db.backref('users', lazy='dynamic'))
    tokens = db.relationship(Token, backref="user")

    def has_role(self, role):
        if isinstance(role, str):
            # if role is the name of the role and not the object
            return role in (role.name for role in self.roles)
        else:
            return role in self.roles

    def set_password(self, password):
        self.encrypted_password = bc.generate_password_hash(password)

    def verify_password(self, password):
        return bc.check_password_hash(self.encrypted_password, password)
- Line 16 : we declared a
tokensfield to get the user’s tokens.
1.2 - Unit test
Let’s update our database unit test in test_1_database.py :
# tests/test_basic.py

from app.database import db

def test_db_tables(client):
    assert len(db.metadata.sorted_tables) > 0
    tables = ["users", "roles", "user_roles", "tokens"]
    assert all(table in [t.name for t in db.metadata.sorted_tables] for table in tables)
1.3 - Testing with DB SQLite browser
Let’s reset our database to make sure the tables and associations are created.
# assuming you're in flask_learning/my_app_v8 (venv)
flask reset-db

Looks good :-) Let’s add the logic now.
2 - Token whitelisting implementation
2.1 - Creating a new token
A token is created when a user is logging in, so we need to update the login route in app/api_v1/user.py : (and we don’t forget to import the Token model)
# api_v1/user.py

from flask import (
    jsonify, request
)
from . import api_v1_blueprint
from ..bcrypt import bc
from ..database import db
from ..jwt import generate_jwt
from ..models.token import Token
from ..models.user import User

[...]

@api_v1_blueprint.route('/login', methods=['POST'])
def login():
    datas = request.get_json()
    username = datas.get('username','')
    if username is '':
        return jsonify(error="username is empty"),422
    password = datas.get('password','')
    if password is '':
        return jsonify(error="password is empty"),422
    current_user = User.query.filter(User.username == username).first()
    if current_user is not None:
        if current_user.verify_password(password):
            claims = {'user_id' : current_user.id}
            jwt = generate_jwt(claims)
            token = Token()
            token.hash = jwt
            token.description = "could be location or something idk from request"
            token.user_id = current_user.id
            db.session.add(token)
            db.session.commit()
            return jsonify(token=jwt),200
        return jsonify(err="password incorrect"), 401
    return jsonify(err="username incorrect"), 404
Now everytime a user log-in, a new token is added to the whitelist.
2.2 - Verify the token
Let’s now implement the verification. For that we need to update our login_required decorator.
# api_v1/decorators.py

from functools import wraps
from flask import (
    jsonify, request
)
from ..jwt import load_jwt
from ..models.user import User


def login_required(fn):
    @wraps(fn)
    def wrapped(*args, **kwargs):
        if 'Authorization' not in request.headers:
            return jsonify(err="no Authorization header found"),400
        try:
            jwt = request.headers['Authorization']
            claims = load_jwt(jwt)
        except Exception as err:
            return jsonify(err=str(err)),401
        if 'user_id' not in claims:
            return jsonify(err="token is not valid"),400
        current_user = User.query.get(claims['user_id'])
        if current_user is None:
            return jsonify(err="404 User not found"),400
        for token in current_user.tokens:
            if token.hash == jwt:
                return fn(current_user=current_user, *args, **kwargs)
        return jsonify(err="token is not valid"),401
    return wrapped

[...]
The decorator now checks if the token is in the user tokens whitelist. If not, it fails.
3 - Logging out
This route will delete the token currently used.
3.1 - Adding the route
Let’s add this route in app/api_v1/user.py
# app/api_v1/user.py

from flask import (
    jsonify, request
)
from . import api_v1_blueprint
from .decorators import login_required
from ..bcrypt import bc
from ..database import db
from ..jwt import generate_jwt
from ..models.token import Token
from ..models.user import User

[...]

@api_v1_blueprint.route('/logout', methods=['POST'])
@login_required
def logout(current_user):
    for user_token in current_user.tokens:
        if user_token.hash == request.headers['Authorization']:
            db.session.delete(user_token)
            db.session.commit()
            return jsonify(msg="logged out"), 200
    return jsonify(msg="logged out"), 200
3.2 - Unit test
We add our unit test in a new file tests/test_4_logout.py :
# tests/test_4_logout.py

def test_login_before_logout(client, global_data):
    correct = client.post("/api/v1/login", json={
        'username': 'testuser', 'password': 'test_user'
    })
    json_data = correct.get_json()
    global_data['old_token'] = json_data['token']


def test_logout(client, global_data):
    rv = client.post('/api/v1/logout', headers={'Authorization': global_data['old_token']})
    assert rv.status_code == 200


def test_login_required_invalid_token(client, global_data):
    rv = client.get('/need_login', headers={'Authorization': global_data['old_token']})
    assert rv.status_code == 401
Here we simply login then logout, so we got an invalid token to use later for the updated login_required decorator.

2.3 - Testing with Postman
# assuming you're in flask_learning/my_app_v8 (venv)
flask reset-db
flask create-admin 'root' 'root@mail.com' 'toor'
flask run
- with a non-whitelisted token :

- with a whitelisted token :

Working great :-)
Conclusion
If you’re stuck or don’t understand something, feel free to drop me an email / dm on twitter / a comment below. You can also take a look at flask_learning/flask_cybermooc/version_8 to see the reference code. And use run.sh to launch it.
Otherwise, congratulations ! You just learned how to implement token whitelisting :-)
You’re now ready to go to part 9 to learn how a user can revoke some of its tokens.
