Flask - Part 2
22 Sep 2018 · 4 min read
Introduction
This version_2 will explain how to structure your project to easily integrate your models, templates, ORM … and of course unit tests.
For this version_2, we will code the same app as version_1, no big deal.
1 - How to structure our app
To organize our routes, let’s start again from scratch :
# assuming you're in flask_learning
mkdir my_app_v2
cd my_app_v2
mkdir tests
mkdir app
initialize our venv :
# assuming you're in flask_learning/my_app_v2
virtualenv venv -p python3
source venv/bin/activate
# (venv)
pip install flask pytest
pip freeze > requirements.txt
and now lay down our achitecture :
# assuming you're in flask_learning/my_app_v2 (venv)
touch wsgi.py
touch app/__init__.py
mkdir app/api_v1
touch app/api_v1/__init__.py
touch app/api_v1/hello.py
With this architecture, we can easily update our api without breaking backward-compatibility.
2 - Creating our app
2.1 - Application factory
application factory is the file that contains the function create_app which returns our app.
Our application factory is app/__init__.py
# app/__init__.py
# application factory

from flask import Flask

def create_app():
    app = Flask(__name__)

    from .api_v1 import root_blueprint
    app.register_blueprint(root_blueprint)

    return app
- An application factory is mandatory to launch our app via a WSGI server (gunicorn, nginx…)
- line 9 : we use blueprints to organize our app into components.
Speaking about WSGI server, to facilitate the launch of our app, we created earlier a wsgi.py file. This file unique goal is to instantiate our app so flask can run it (yes that’s 2 lines).
# wsgi.py

from app import create_app

app = create_app()
2.2 - Our first API
Let’s create declate our root_blueprint in app/api_v1/__init__.py.
# app/api_v1/__init__.py

from flask import Blueprint

root_blueprint =  Blueprint('root', __name__)

# Import any endpoints here to make them available
from . import hello
- line 5 : we declare our blueprint that will be composed of multiple routes (endpoints)
- line 8 : we are importing from the current folder
.the filehello.pythat will contain some endpoints.
2.3 - Our first route
Let’s code our fiirst route in api_v1/hello.py:
# app/api_v1/hello.py

from . import root_blueprint

@root_blueprint.route('/', methods=['GET'])
def hello_world():
    return 'Hello, World!'
As we saw earlier, this route belong to root_blueprint. This route will be accessible at /.
2.4 - Testing our app
It is important (crucial) to test your app.
Testing may seem difficult or boring but if you adopt unit-tests early, it will become a habit to create them.
First we need to create a client that will be injected in all our tests. Let’s create a file named conftest.py :
# assuming you're in flask_learning/my_app_v2 (venv)
touch tests/conftest.py
and add :
# tests/conftest.py

import pytest

from app import create_app

@pytest.fixture(scope="session")
def global_data():
    return dict()

@pytest.fixture(scope="session")
def client():
    test_app = create_app()
    test_app.config['TESTING'] = True
    client = test_app.test_client()
    yield client
Those 2 functions will be executed only once and they will inject their data inside every other test cases.
global_data allow us to share data between tests, and client represents the test_client to query our API.
2.4.1 - Quick thing about pytest scopes
- “scope=function” : Run once per test
- “scope=class” : Run once per class of tests
- “scope=module” : Run once per module
- “scope=session” : Run once per session
and some useful links :
- article 1 - pytest-fixtures-nuts-bolts
- article 2 - testing-a-flask-application-using-pytest
- article 3 - pytest-sharing-class-fixtures
- official doc 1
- official doc 2
Then we create tests/test_root.py file. Every file need to be named test_*.py to be automaticaly discovered.
# assuming you're in flask_learning/my_app_v2 (venv)
touch tests/test_root.py
In this file we add our test :
# tests/test_root.py

def test_root_endpoint(client):
    rv = client.get('/')
    assert rv.status_code == 200
    assert b'Hello, World!' in rv.data
To run every test at once, we run this command:
# assuming you're in flask_learning/my_app_v2 (venv)
python -m pytest tests/
If everything went great, you should see this :

2.5 - Launching our app
To launch our app :
# assuming you're in flask_learning/my_app_v2 (venv)
FLASK_ENV=development FLASK_APP=wsgi.py flask run --host=0.0.0.0 --port=5000
HTTPie:

Postman:

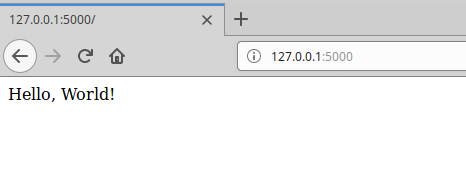
Browser:

Working great :-)
Conclusion
If you’re stuck or don’t understand something, feel free to drop me an email / dm on twitter / a comment below. You can also take a look at flask_learning/flask_cybermooc/version_2 to see the reference code. And use run.sh to launch it.
Otherwise, congratulations ! You just learned a lot of things :-)
Unit testing your app, creating a blueprint… Your app is now designed to be easily extended in the (near) future.
You’re now ready to go to part 3 to learn how to connect your app with a database.
